Today I’m excited to share my first experience with real pants fitting! I say *real* pants fitting because I have made elastic-waist pants before and — as you can imagine — those don’t require much in the fitting department. This week I decided to tackle the trousers planned for my Spring in Isolation module.
I had planned to make the Closet Case Sasha Trousers and bought the pattern, but they just seemed too dressy for working from home all the time. I still wanted something that looks sharp and that I could make using a stretch twill I had from Sewing Studio. Cargo pants felt like the perfect fit.
I considered buying a pattern specifically for cargo pants, like the Bryce Cargos by Hey June Handmade, but I didn’t really want the big pockets on the leg or the slat pockets. Again, slat pockets just feel too dressy. I also wanted a pattern designed for a stretch woven, so I decided to use the Mia Jeans pattern by Sew Over It, from their City Break eBook. I’ve been working my way through the book and have loved every pattern.
As the name suggests, the Mia Jeans pattern is for jeans. But pants are pants, right? Isn’t a cargo just a jean in a different material? Turns out I wasn’t far off. When I searched for some inspiration for cargos, I found them mostly the same as jeans but made in a twill with different pocket options. Here’s my favorite find — note the price tag.

That’s right: $450. So if I paid $35 for my 2.5 yards of stretch twill, then I should have $415 leftover to spend on fabric, right?
What I liked about these were the U-shaped front patch pockets. I puzzled over how to make a patch pocket where the opening on top is so curved that it can’t be turned under and topstitched, as any other patch pocket would. I drafted a piece and sewed up a sample where I sewed a front and back together, open on the side, and then turned them inside-out. This was just too thick. My second test was a success. I made a small pocket facing just for the top edge and sewed it onto the pocket just like a neckline facing.

Now I have some cute Hawaiian fabric I can peek at inside my pockets! My inspiration for the back pockets was in another pair of cargos I found.

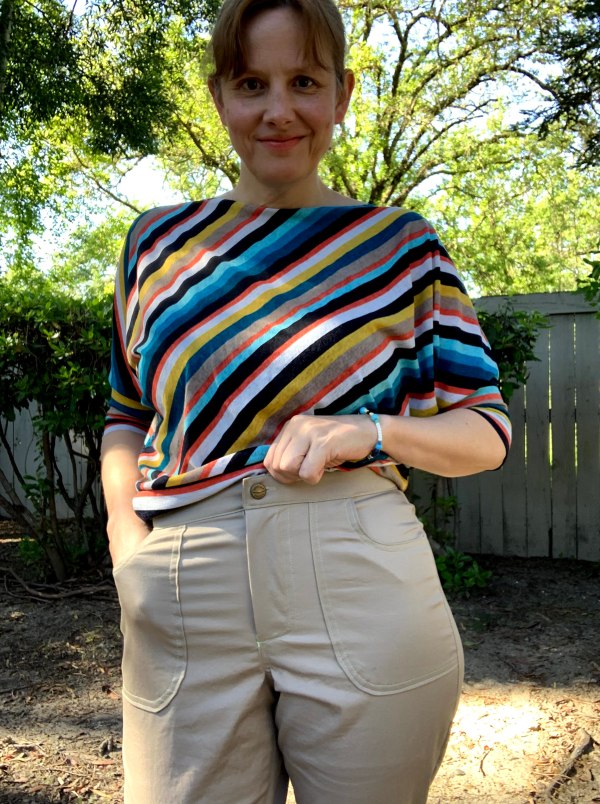
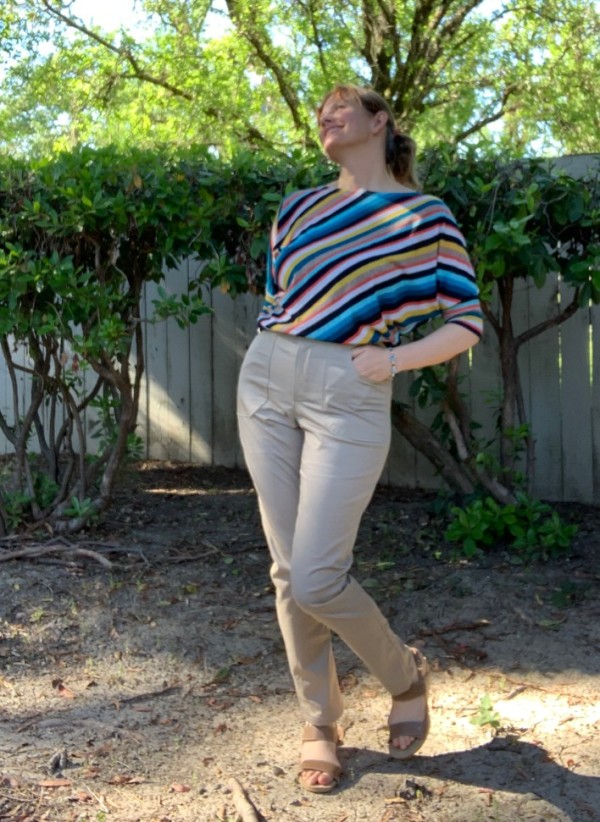
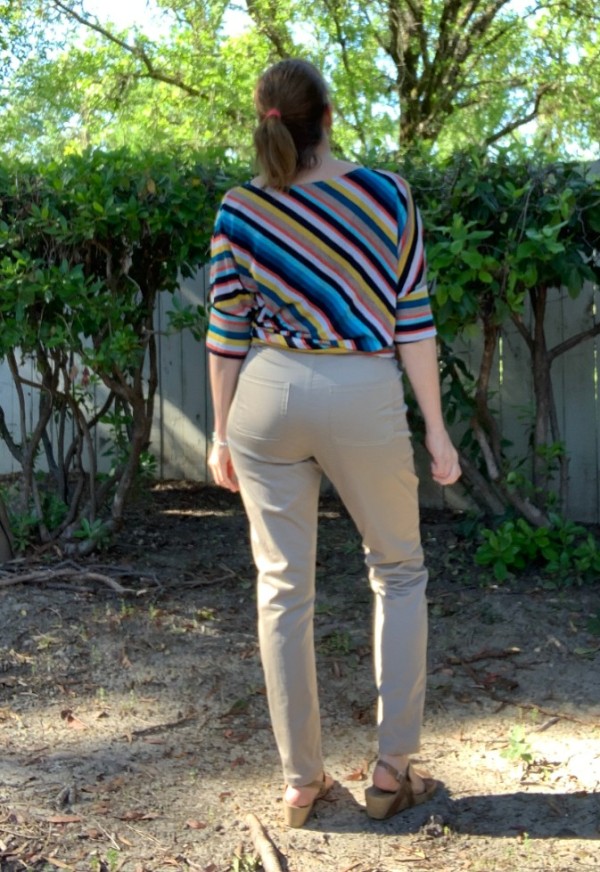
I liked the square-ish nature of these pockets. It seemed pretty universal that jeans pockets are a pentagon, but cargo pockets are more a square shape. The yoke on cargos is also more straight across, whereas jeans are a chevron, so I copied that too. I didn’t want the pocket flap, though, as it would add to much bulk to my backside. Here’s my finished back pockets and yoke:

Fitting was a real journey, as I’m sure you can imagine. I did two muslins out of a lightweight stretch twill I bought from Califabrics for about $3 a yard. The first muslin was just way too small. I sized up and the second muslin had new issues. The pants were pulling and bunching funny in front. Fabric was also still stretching over my backside.
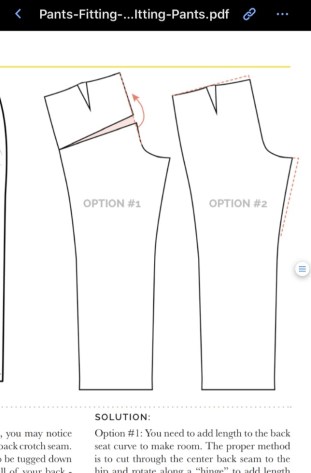
I consulted Heather Lou’s pants-fitting pdf that I received in my Learn to Sew class. I also found this pants-fitting guide by 5 out of 4 Patterns very helpful. I did the full outer thigh adjustment and the full seat adjustment (slash and spread on the left side below) to my original pattern pieces and it gave me the room I needed. I also added 4″ (!) in length.
I also used my muslin to try my first fly-front zipper insertion. I picked an invisible zipper out of a skirt in my “refashion” pile and used that to do the fly-zip steps. Unfortunately the zipper broke the first time I pulled it up, but I was still glad for the learning experience.

Two muslins still wasn’t enough to get the fit perfect. On my final pants, I basted the outside leg seam together just in case there were issues (and this fit in my muslin). They were too tight! I pulled out the basting stitches and stitched out wider. The basting stitches left big holes in fabric, though. Hopefully they will come out in the wash. I think I’ve learned to baste wide and get narrower when you’re fitting. Doing it the other way damages your fabric and forces you to squeeze into too-tight pants, bringing back a lifetime of bad dressing room experiences.

Despite some mistakes on the fly front in the muslin, the fly front came together great on the real garment. Erin at Sie Macht’s post about making Mia Jeans was very helpful. I especially took to heart the “put away your automatic buttonholer.” I love my giant 60s buttonholer attachment for the Singer, but she’s right — it’s just too much machine for this. I did a manual buttonhole per the video she suggested and it looks great.


A note about the zipper: If you’ve been listening to the Love to Sew podcast lately you’ll know there’s a raging debate going on about whether you shorten zippers from the top or the bottom. I didn’t know which team to join. In the end, I just didn’t want to rip teeth off my zipper. It seemed too violent. I decided to shorten from the bottom, where I didn’t have to damage any part of the zipper and any actions were completely reversible.
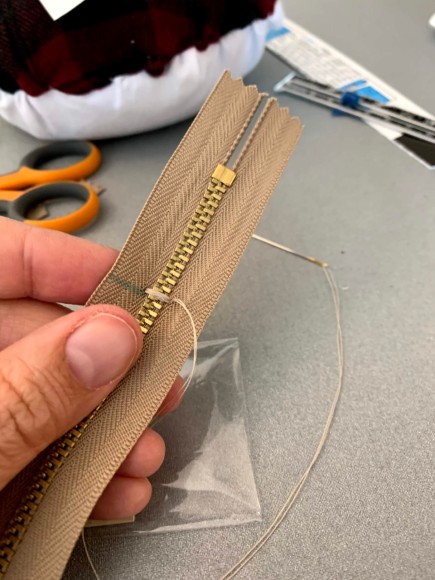
To shorten from the bottom, you simply hand sew 8-10 loops around the zipper to form a new zipper stop. Worked for me! I did end up using the wire cutters to cut off the excess — but not until the pants were completely finished.
These pants make two out of six garments done for my spring module. The first piece was done was this Blackwood Cardigan. Please visit again to check back on my progress!

Bravo, those pants certainly took a lot of figuring but the fit was worth it.
Thanks! I’ve never owned a pair of cargos because they never fit!
These are great! I have made the Mia jeans out of denim, but I didn’t add front pockets. I live your mods with these. 👌👌👏👏
Sorry……. love your mods! 🤣