What a difference some simple adjustments to a pattern can make! I learned that lesson this week making two knit tops. First, I want to share the Sew Over It Edie top, from the Sew Over It eBook “Work to Weekend.” I took the time with this make to review the pattern measurements and make adjustments, and I love how it came out!
Second, I want to share the Grainline Lark Tee, where I did not take the time and I was not happy with the fit.


Our story starts when I had five days off work around the Memorial Day holiday to do some sewing. Here’s how it went down:
Day 1 — Two pieces of fabric arrived at noon from Blackbird Fabrics, both cotton modal jersey knits: one copper and one green. I pulled the Lark pattern out of my pattern binder (because I’d made it before), cut out the copper fabric (not even slowing to pre-wash) and serged it together in a few hours.
The last time I made the Lark, it fit. I’m not sure if the pattern paper shrunk in the binder, or I had hacked it up with some “ideas” before I had stashed it away. Anyway, I was not happy with the result. The Blackbird fabric cost $17/yard, which is a lot for me to spend. As you saw in the picture above, the tee turned out way too tight in front (for my taste). Of course, I had not done any grading or adjustments or even looked at the size I was cutting before I hit the machines.
It’s actually not a total fail. I think it looks great with a jacket and I like the high neck (which did turn out to be a hack I put in the pattern, among others, after I made it and before I stashed it in my binder).


Day 2 — I printed out the Edie top from the Sew Over It Work to Weekend eBook and taped it together. I looked over the instructions and realized I didn’t have the fusible stay tape required. I put it aside and moved on to the Stevie Romper by DIBY Club.
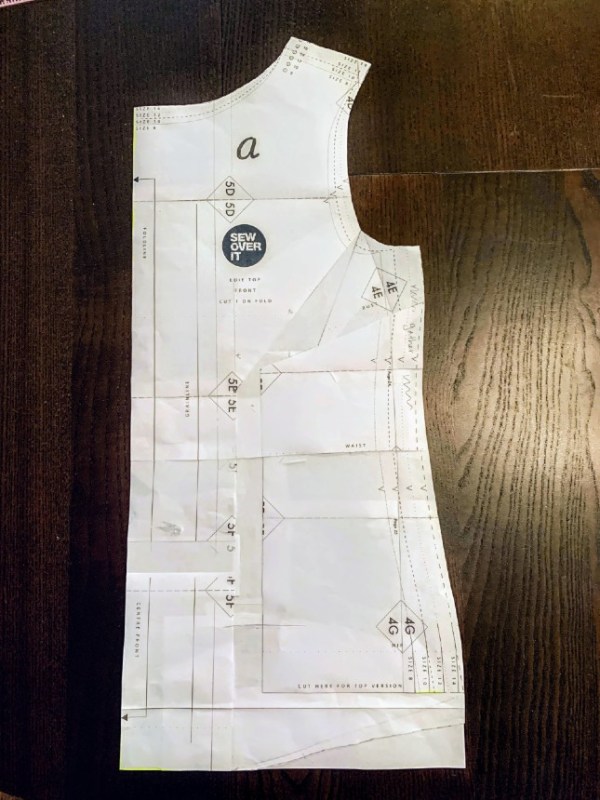
With the Lark tee experience fresh in my mind, and knowing that the DIBY Club instructions are extremely thorough, I decided to take my time and do every fitting step suggested — and there are a lot. I started with grading, from an 8 at the high bust and shoulder to a 14 at the waist. (Funny because for Itch to Stitch patterns I grade the waist down two sizes from the hip). I did the FBA, which I never would have thought of for a knit top. It took me about an hour to slice and dice the pattern and then I went to bed.
Day 3 — I woke up and read an email from Tilly and the Buttons on How to do a Full Bust Adjustment on a dartless bodice. Well, this was exactly what I had done the night before! But it was a different method. When you add fabric to the front of the pattern, it will lengthen it, and they suggested using gathering stitches on the side of the shirt to gather up this length and make the front piece then match the back piece. I had to try this immediately to compare to what I had just done with the Stevie Romper. I went to work slicing and dicing the Edie top I had set aside.
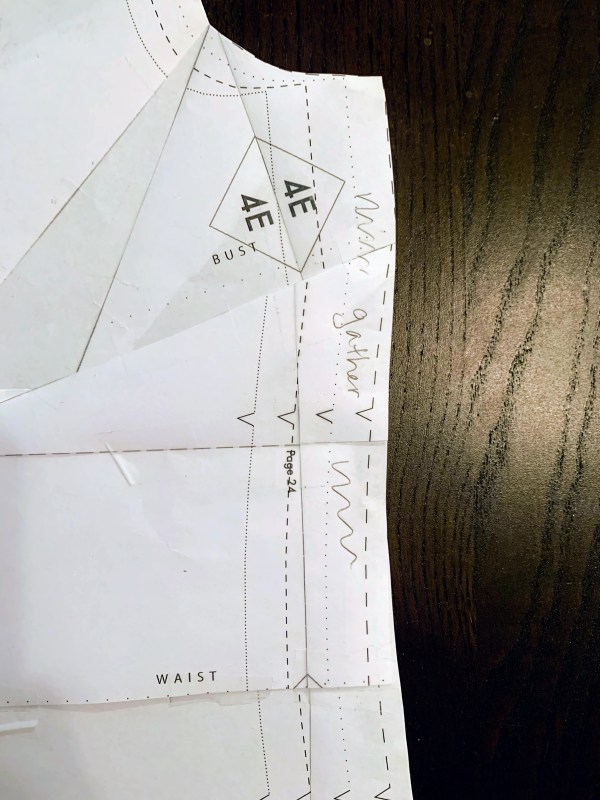
I still didn’t have the stay-tape called for in the instructions. But I had an idea…
I had recently received some very light cotton jersey from Girl Charlee. I scored 2 yards of it for $6.50! The fabric was far from opaque, though, so I had a notion to block interface the entire front and back pieces. It would take a lot of interfacing, but I usually buy 5-yard pieces of Pellon EK130 EZ-Knit at Joann for around $3/yard, so why not?
I marked my pieces on the fabric and then laid the interfacing over and cut a rectangle that covered the pieces. Holding 16 seconds on every tiny square that my iron covers took forever! I was wishing I had the giant surfboard-size ironing maching my dad had in his clothing store.

I then laid the patterns on the interfaced fabric and traced around them (again) and then cut out with scissors. Time for bed.
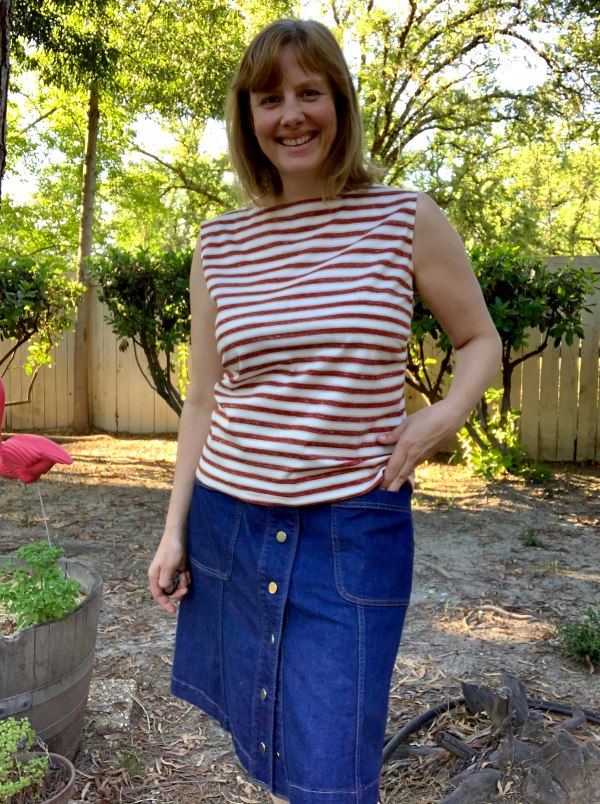
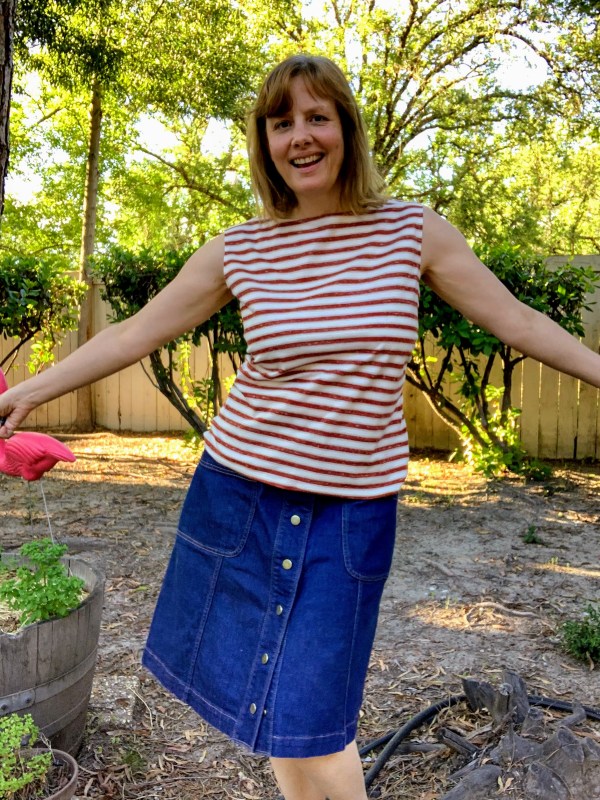
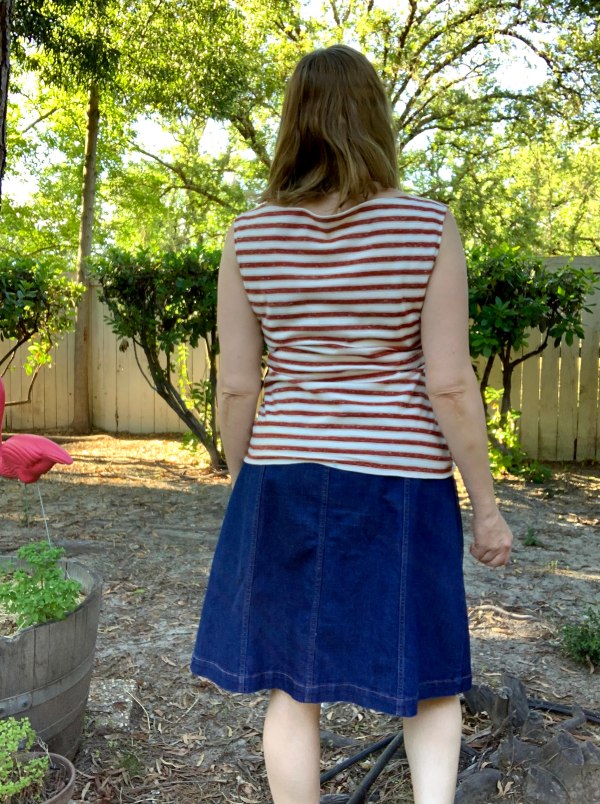
Day 4 — I made the Edie top out of the reinforced fabric. I’m not surprised that the Tilly team knows their stuff and I love the fit. Sure, the side gathers cause the stripes to mismatch, but no one can see that — I rarely raise my arms.
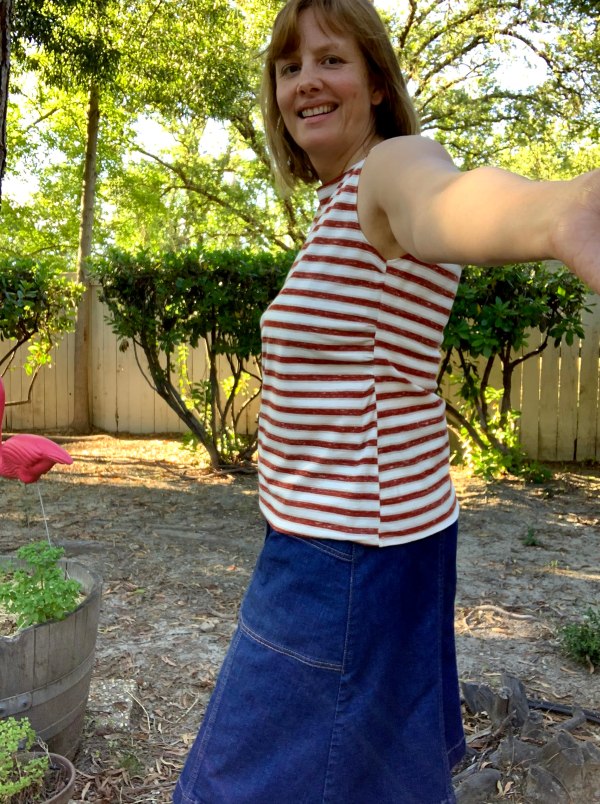
The Edie is of course meant to have sleeves and I cut them out of my fabric, but when I tried this on for fit after sewing the side seams, I absolutely loved it sleeveless, and the armscye was a tight fit all around. I finished the arms in the same way the boat neck is finished — just turn under 1/2″ and topstitch.


Did the interfacing work? I would say so! The inside is a tiny bit scratchy in parts, but the shirt is now completely opaque and not as stiff as I thought it would be. I want to see how it handles in the wash, but I expect to do this again with thin knits in future.
Thanks for following my fitting adventure. Check back soon to see the Stevie Romper! -rp
