I love the name of this pattern company: Peek-a-Boo! This designer, Amy (in Eastern Oregon), was new to me when I went in search of a men’s shirt pattern last month. I had purchased a 1-3/8 yard scrap of Pendleton wool for $20 from SewingStudio.com (also in Oregon) and wanted to make my husband, Eric, a nice wool shirt out of it. The Peek-a-Book Yukon Button-Up looked perfect. As always seems to happen, mistakes were made, and the shirt ended up being a vest!

What seems to have happened was as follows:
- I swear I cut two short sleeve pieces
- One of the short sleeve pieces went missing
- I ran out of fabric
This is my first-ever button-up shirt make, so I made a muslin. In a strange case of history repeating itself, I had lost a sleeve piece for the muslin.


From the muslin make-up, I knew I’d need to shorten the length. I also found I had inverted the back pleat. The collar and collar stand looked great.
The Pendleton wool is such a gorgeous fabric and so fun to work with. It’s got a buttery feel to it — not itchy at all. Everything was going fine until I went to set in the sleeves. This is when I discovered house tinies had run off with one of them to use as a large family blanket.
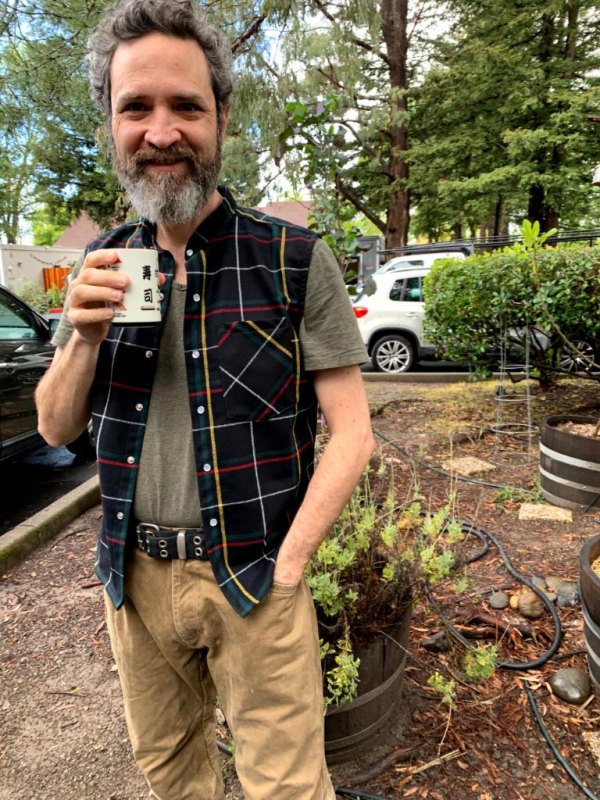
Eric suggested a vest, so I googled “Pendleton vest” and found some intriguing ideas. If I rounded the collar stand and left off the collar, I could have this band collar.


I semi-executed that, but one side of the band collar turned out square and one was rounded.
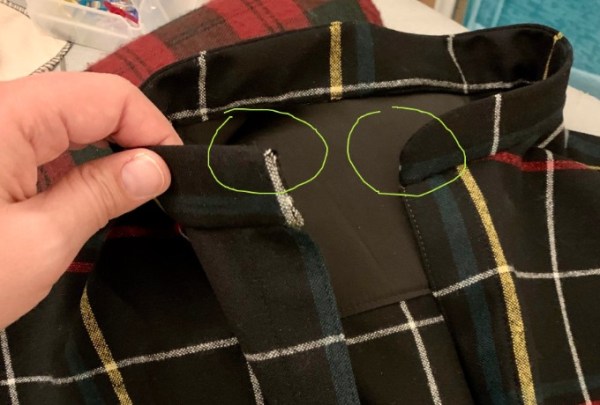
To fix this, I just stuffed the fabric inside and hand sewed it shut. Then I topstitched all the way around the collar stand. You can see above, I used some silky black lining fabric in my stash for the inner yoke — one of my favorite details on this vest.
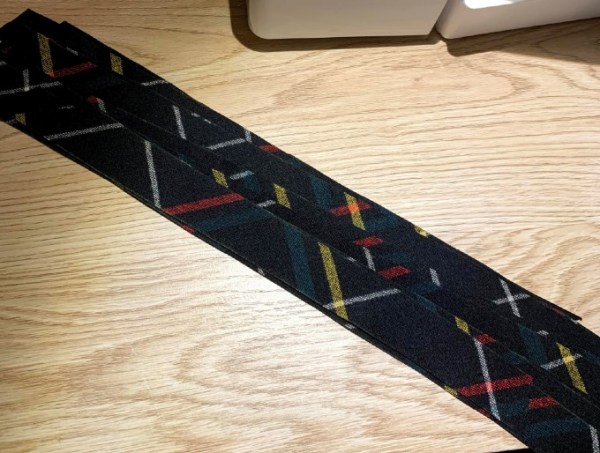
To finish the armscyes (armscyi?), I made bias tape out of the remaining sleeve using the Closet Case method. I went back and watched Heather Lou’s tutorial on a bias-bound neckline from her Learn to Sew Clothing class I purchased last year and did every step — even the understitching (Heather would be so proud). I’ve got a lot of wool bias tape left. What would you do with it? Please leave a comment!
After the arms were finished I moved on to the hem. I ended up taking 4″ off the bottom, going off the Pendleton vest inspiration pics. That works for a thick vest, but I feel like I could have left some of the length for such a light vest. Eric is happy with it — and my dad approved of it in a FaceTime video — so no looking back.
Next for the really fun part. The instructions for the Yukon Button-Up said to do the buttons after sewing the placket. I wanted to do pearl snaps because that’s what we do on a wool shirt where I’m from in the Northwest of Washington state. So I had to wait for them to come in the mail. When they arrived, I used another excellent video by DIBY Club on how to install pearl snaps without expensive hardware.


Amazingly, I didn’t hammer my fingers. The first three snaps didn’t attach, though, and I was left scratching my head. I called in Eric and had him watch the video. “The back of your snap is upside-down.” Doh! Once I had it right-side up it popped together with just three taps of the hammer.
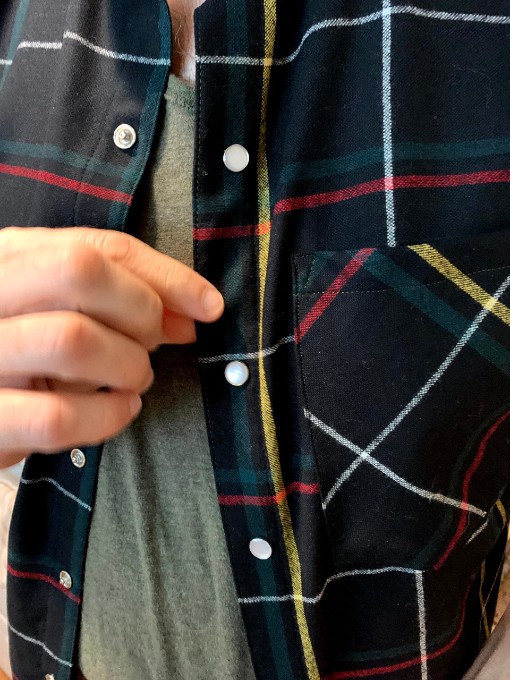
I absolutely love the look of these snaps! I’m really tickled I installed them, too, and without a $30 snap wrench. The stripes even match on either side of the placket.
All-in-all this is one of my favorite projects to-date. I’m not sure what the outfit is for this vest, but I think it looks great over a t-shirt and would add about 15% warmth to your core. Definitely useful in early spring, and now I have a great shirt pattern I will use over and over. -rp
